
Did you know that March is National Craft Month? I couldn't let it go by without celebrating it! Over the next few weeks I have guests taking over my blog to share their favourite craft tutorials and techniques.
National Craft Month is a great excuse to try out a new craft and I hope you will be inspired by the posts I have planned this month. You can check out all the craft tutorials on my blog here. There are different techniques for scrapbooking, stamping, decoupage, Jewellery making as well as crochet.
National Craft Month is a great excuse to try out a new craft and I hope you will be inspired by the posts I have planned this month. You can check out all the craft tutorials on my blog here. There are different techniques for scrapbooking, stamping, decoupage, Jewellery making as well as crochet.
It's also National Crochet Month so first up I have a crochet tutorial by Katherine who has kindly shared her technique for foundation stitch.
Katherine lives in Canada and is a regular on #CraftBlogClub. Katherine shares her yarn and beading tutorials on her website. Katherine also writes fiction, mostly on her blog but some of it has been published in literary magazines as well. She says, "If I'm not writing or reading, I'm probably doing something with stringy stuff, and possibly with beads as well".
Over to Katherine.......
Over to Katherine.......
The great thing about crafting is that there's at least one alternative technique for every standard. And the more techniques you know, the better you can choose the one that's best for the situation at hand!
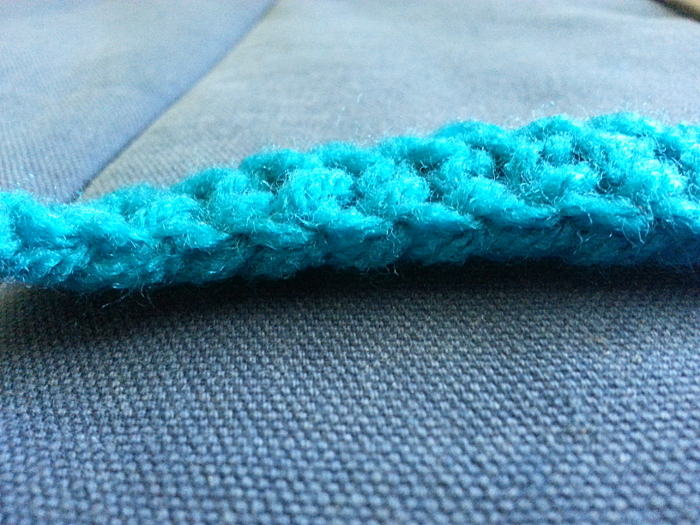
This tutorial focuses on foundation crochet stitches. Foundation crochet creates the first row of a crocheted piece without having to make a foundation chain to start. It is smoothly finished on both the top and bottom edges, and has the same amount of “give” as the rest of the fabric (no pulling in or fanning out!).
If you: make foundation chains which are much tighter or looser than the rest of your work;
Or you: are making a crocheted piece with a lot of starting stitches, like a blanket or a coat;
Or you: really, really hate that first row of working through chain after chain;
Then you will want to know about foundation crochet!
And if you: hate written instructions, here’s a video demonstration I found.
(Note: since this post is being published on a British Web site, British crochet terms are used throughout. Here's a handy list for converting terms.)
The basic formula:
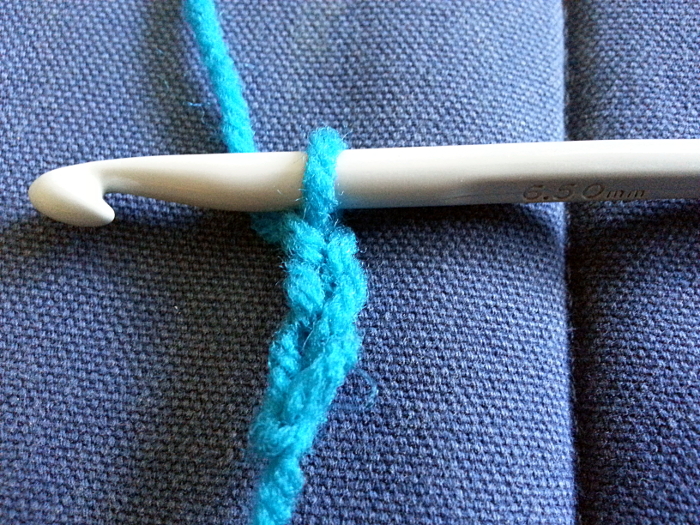
- Chain 1 to work the first stitch, plus however many chains you would normally work at the start of a row with that stitch. For example, if you are starting with a double crochet, chain 2 (base chain plus start-of-row chain); for a foundation treble crochet, chain 4 (base chain plus chain-3 starting stitch). If the stitch you are using counts the starting chain as the first stitch, that rule still holds.
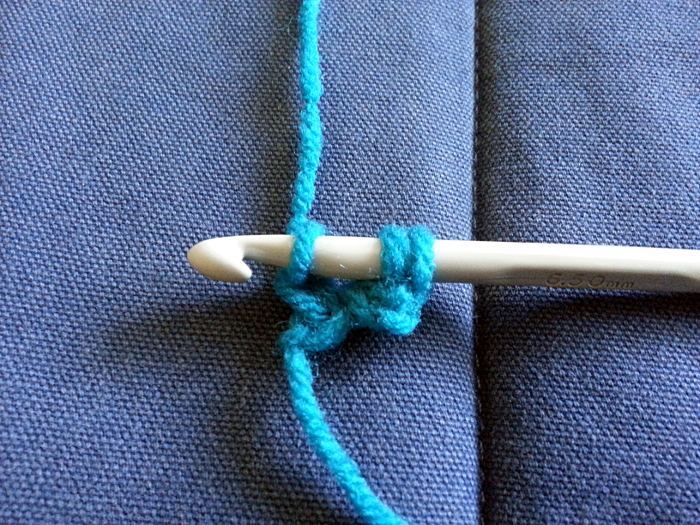
- Start to make a stitch in the chain farthest from the hook, but instead of working “yarn over (yo), pull yarn through 2 loops on hook” as the first part of forming the stitch, work “yo, pull yarn through 1 loop on hook” first. This forms the chain for the next foundation stitch.
- Work the stitch as normal — in this case, yo, pull yarn through two loops, yo, pull yarn through two loops (foundation treble made).
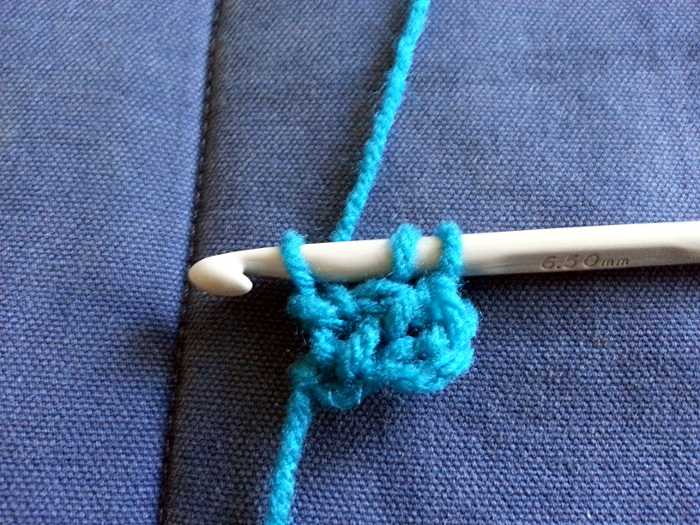
- Look at the bottom of the last stitch. You will see a V-shaped loop, similar to the loops which appear at the top of a row of crochet. Insert your hook into this loop and work the next stitch the same as the previous one, working a “yo, pull yarn through 1 loop” before forming the next stitch. Keep forming one loop before working the stitch and inserting the hook into the bottom “V” to form the next stitch until the row is as wide as you need it to be.
Tips and tricks:
- Foundation crocheted rows do not have to be all the same stitch! You are free to mix double, half-treble, treble, or whatever height stitches into your foundation crochet row, just as you might with the foundation chain method.
- If you need to work multiple stitches into the same chain at the start of a row (for the heel of a slipper sole, for example), work all stitches in the group but the last one as regular stitches, and then work the last stitch as foundation crochet.
- If you need to work multiple stitches into the same stitch at the end of a row (for the toe of a slipper sole, for example), work a foundation crochet stitch first, then work the rest of the stitches in the group as regular stitches, all worked into the foundation stitch’s bottom V-loop.
- If you are working an oval shape (to start a rug, for example), foundation crochet across the first half of the round, then work regular crochet into the bottom Vs of the stitches to form the second half of the round. This is the equivalent of working into the top loops of a chain and then the bottom loops.
Stitch tops are just the same as “regular” stitches”:
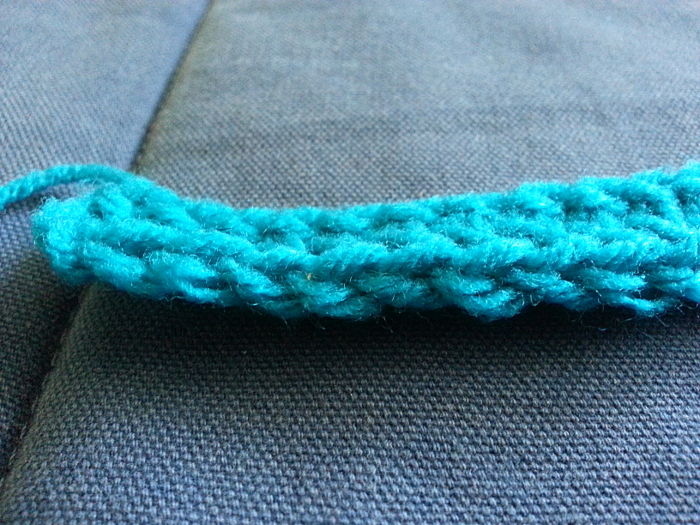
Stitch bottoms look like the stitch tops, but the Vs run in the opposite direction:
Thank you Katherine for a great tutorial. I hope you have found this useful. If you are new to crochet you can check out my tips for beginners here and Katherine will be popping up again later this month to share a tutorial on standing stitch.
In the meantime you can find out more about Katherine over here....
check out her website
find Katherine on Twitter
fizzi~jayne x
No comments:
Post a Comment
Thank you for leaving a comment! I love to hear from you, whether you just pop by to say hi, share your experiences or want to give me feedback. I appreciate your comments and love reading them.